How to configure my email account in Outlook?

This article describes how to configure MS Outlook on your Laptop or Desktop to send and receive emails with your Mail4Work email address.
Default IMAP settings
Throughout this tutorial you will learn how to configure IMAP in MS Outlook using the values below. We recommend IMAP to keep a copy of your emails in your mailbox; this will allow you to sync multiple email clients at once, for example, laptop, mobile, and desktop.
Email address: email address of your mailbox
Password: your mailbox password
Account type: IMAP
Incoming mail server: secure.emailsrvr.com
Outgoing mail server: secure.emailsrvr.com
Incoming mail server TCP port (IMAP): 993 (SSL)
Outgoing mail server TCP port (SMTP): 465 (SSL)
MS Outlook Settings
1. Start Microsoft Outlook. In this demo we will be using Microsoft Outlook 2016.

2. If this is the first time you've opened Outlook, you'll see a welcome page. Click Next to get started.
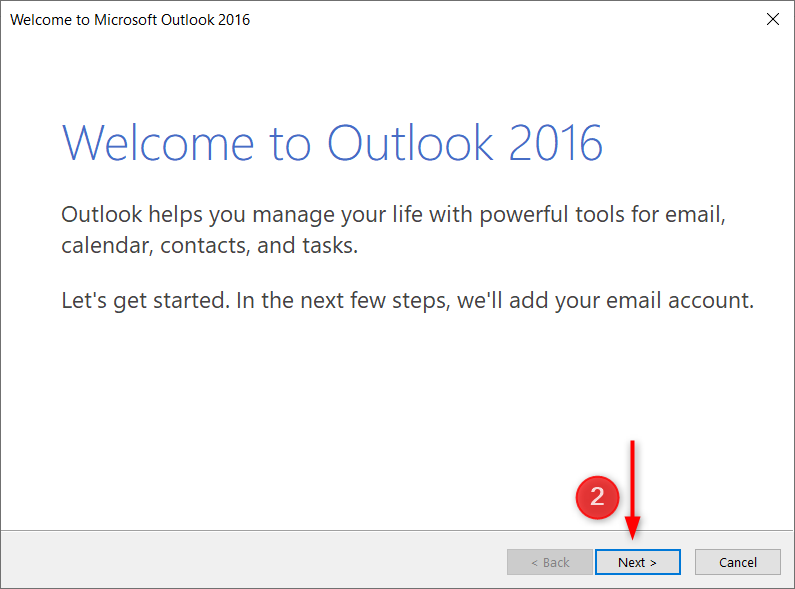
If you've used Outlook before, go to File > Add account.

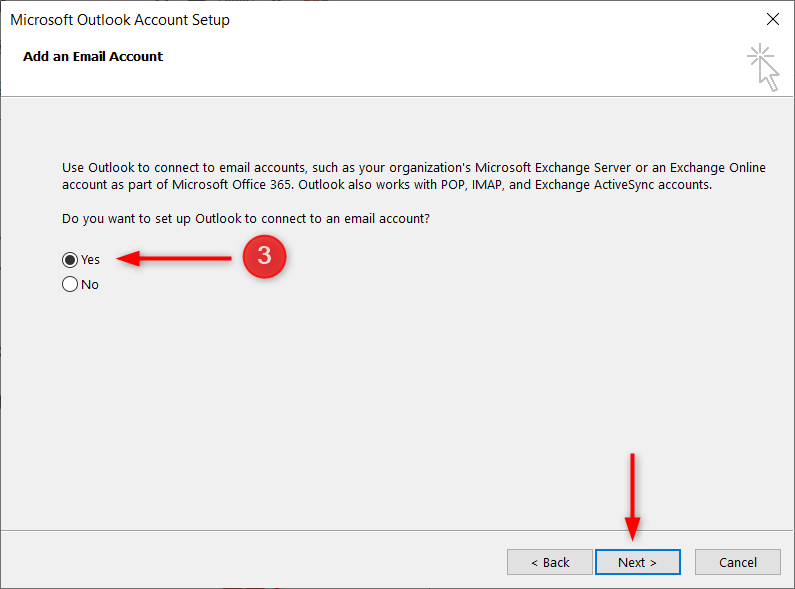
3. Select Yes when prompted to set up Outlook to connect to an email account and click Next.
4. Select Manual configuration or Additional server types and press Next.

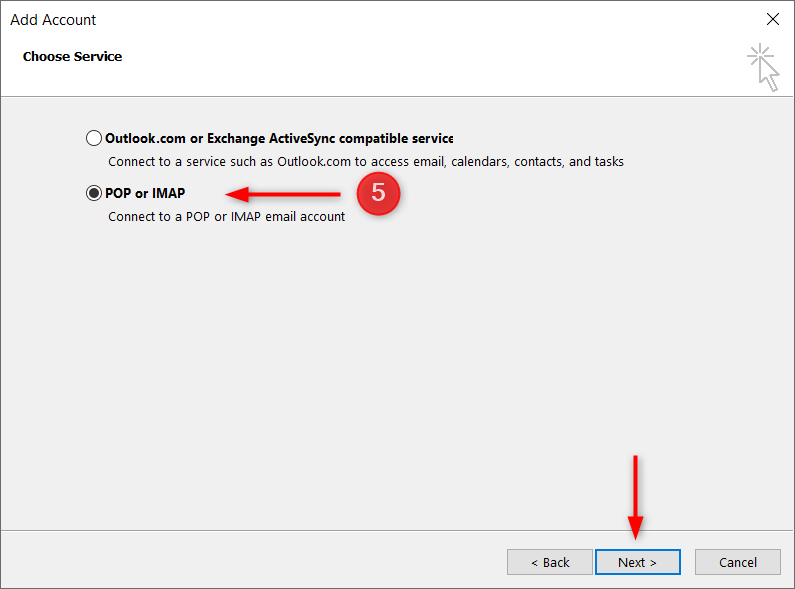
5. Select POP or IMAP and click Next.
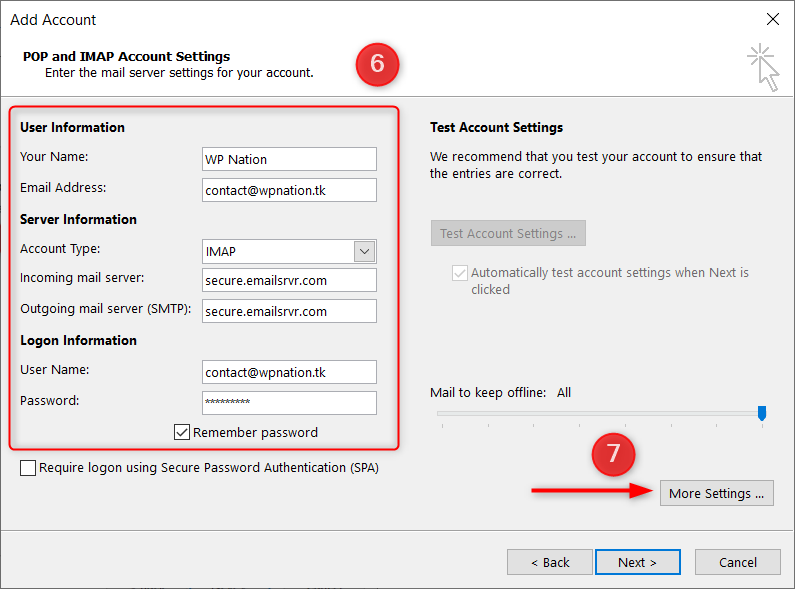
6. In the Add Account window, enter the following information:
User Information
Name: Your name or your company name
Email address: the email address of your mailbox
Account type: IMAP
Incoming mail server: secure.emailsrvr.com
Outgoing mail server: secure.emailsrvr.com
Login Information
Username: the email address of your mailbox
Password: your mailbox password
Once done, click on More settings.
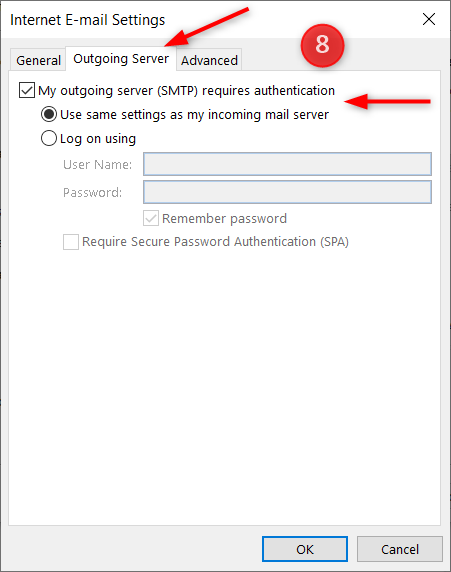
8. Switch to the Outgoing server tab, check My outgoing server (SMTP) requires authentication and select Use the same settings as my incoming mail server.
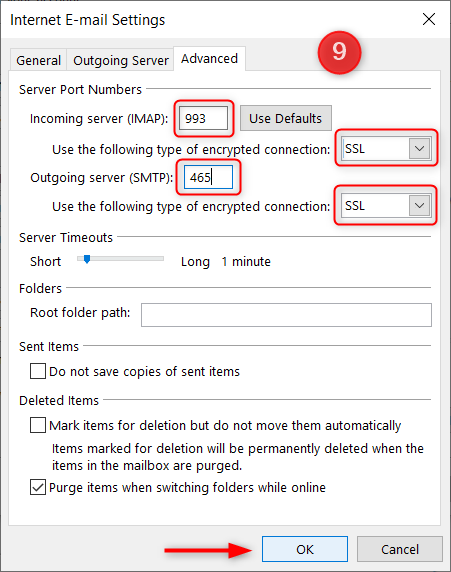
9. In the Advanced tab change Use the following encrypted connection type to SSL for incoming and outgoing servers. Next, change the incoming server port (IMAP) to 993, the outgoing server port (SMTP) to 465< /b> and click OK.
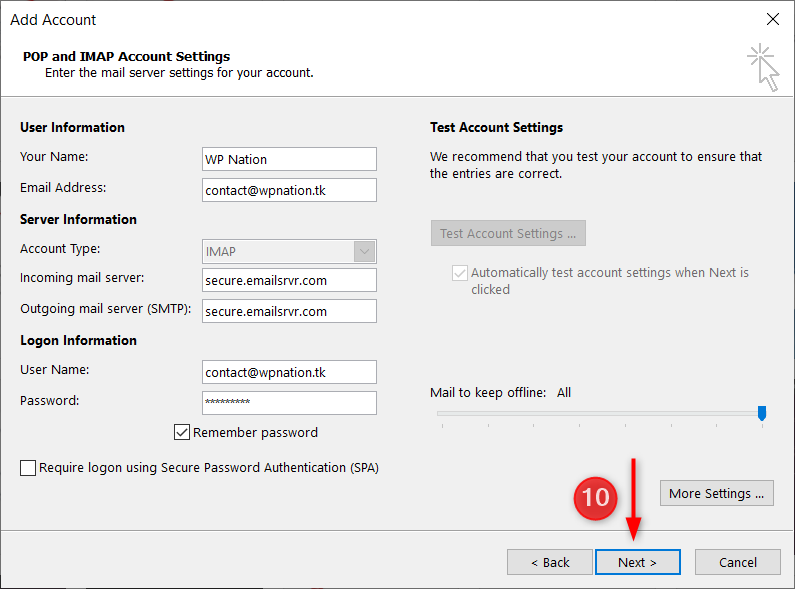
10. Click Next.
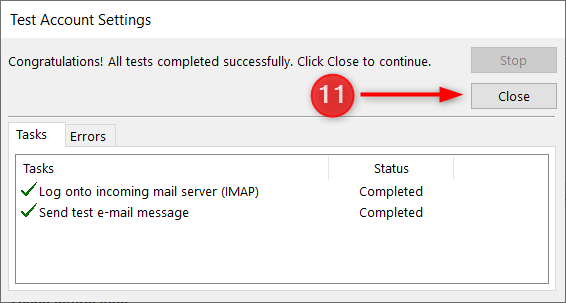
11. Outlook will now try a little test by sending a text message using our settings. If everything was configured correctly the message would be sent successfully. Click Close.
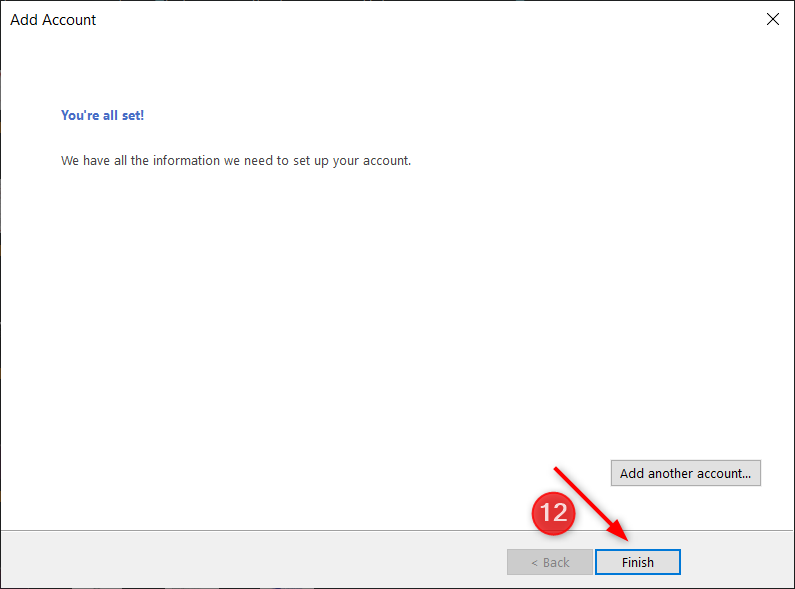
12. Finally, click Finish to close the setup wizard.